Wednesday, January 22, 2014

Instagram Diaries

Raspberry Bloom: Instagram Diaries
{Puerto Escondido stole my heart./ Puerto Escondido robó mi corazón}

The first instagram diaries of the year, I'm really excited to document what 2014 has prepared for us!! :)

El primer "instagram diaries" del año, estoy muy emocionada de documentar lo que el 2014 tiene preparado para nosotros! :)

Raspberry Bloom: Instagram Diaries
{I'm already getting ready for spring, this is the first time I use Meyer lemons and ricotta cheese./Ya me estoy preparando para la primavera, esta es la primera vez que uso limón eureka (los encontré en Costco) y queso ricotta}

Raspberry Bloom: Instagram Diaries
{The cutest donut ever./ La dona más bonita del mundo}

Raspberry Bloom: Instagram Diaries
{Thinking of Valentine's day, and summer, recipe here./ Pensando en el día de San Valentín y el verano, receta aquí.

Raspberry Bloom: Instagram Diaries
{Outfit for Enrique's birthday, I can wear a peplum top anytime of the year. /Outfit para el cumpleaños de Enrique, puedo llevar un top peplum en cualquier momento del año.

Raspberry Bloom: Instagram Diaries
{Berries + yogurt + maple syrup the best way to start my day./ Bayas + yogur + maple syrup la mejor manera de empezar mi día}


Instagram: @dianaabaroa 

Love,
Di

Tuesday, January 21, 2014

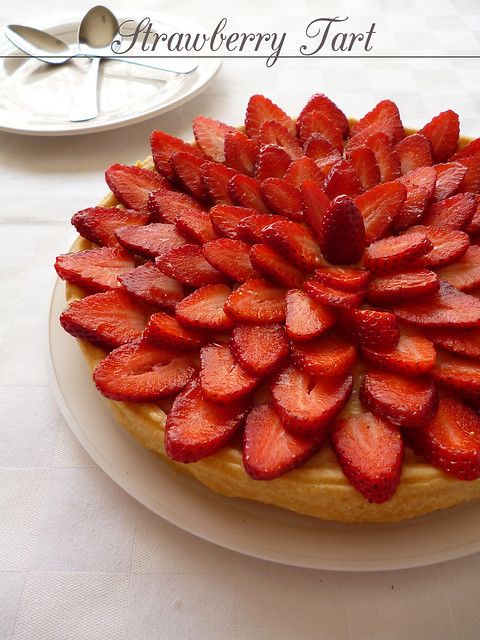
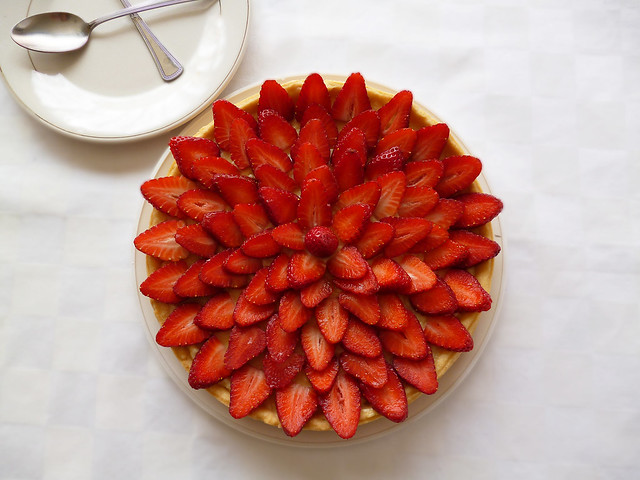
Strawberry Tart

Raspberry Bloom: Strawberry Tart

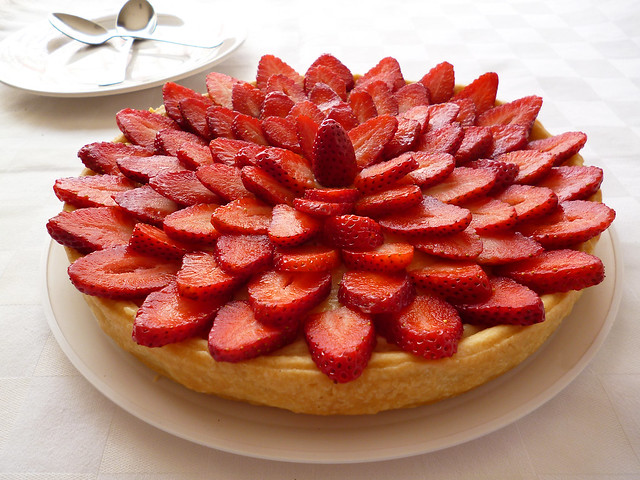
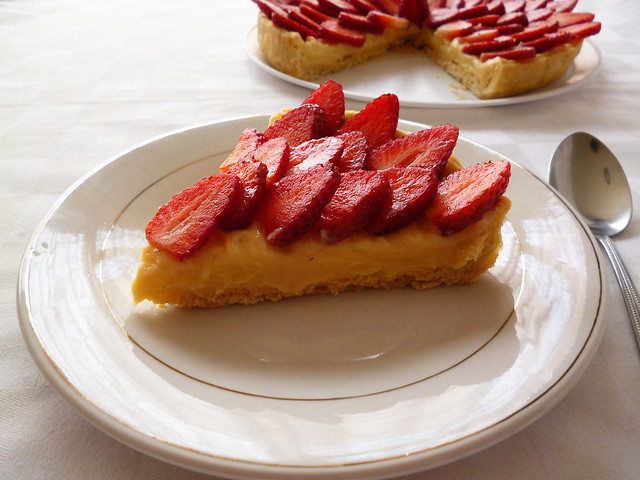
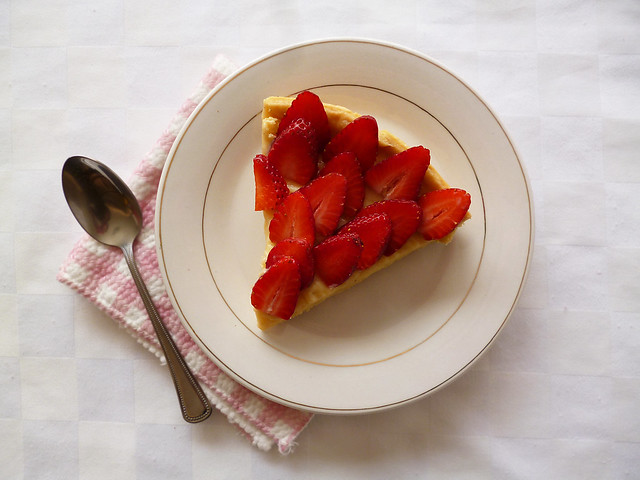
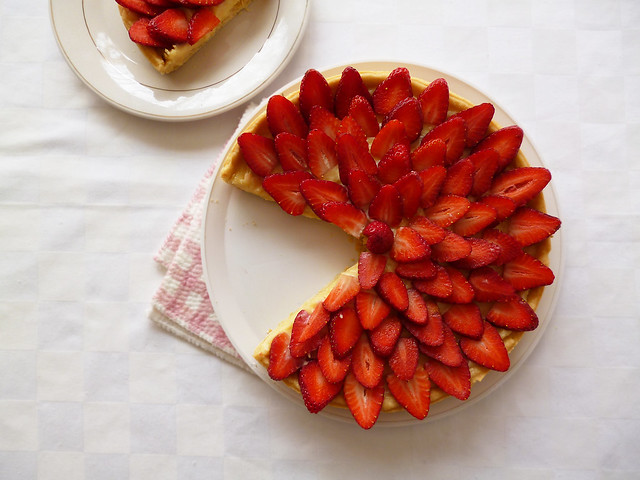
This is the first tart/pie of many more that you'll see throughout the year, and is also the first of three recipe I plan to share for Valentine's Day. I chose this tart because it's very easy to make, and it has a subtle romantic vibe, which in my opinion make it perfect for the occasion. I made this tart having V-day in mind, but I also think it's a warmer weather staple dish.

This tart has a delicious buttery crust, it´s filled with slightly sweetened pastry cream,  and topped with juicy fresh strawberries, in my humble opinion just the best thing ever. Besides, it has accessible ingredients, and you can make ahead most of it. This tart is perfect for a small celebration, a brunch, as dessert for a BBQ party, or just as a weekend treat, especially for the summertime. I hope you enjoy it, and if you have any favorite fruit tart/pie recipe please share!!

Have a great week!!

Esta es la primer tarta/pie de muchas más que veran a lo largo del año, también es la primera de tres receta que planeo compartir con motivo de San Valentín. Elegí esta tarta porque es muy sencilla y tiene ese toque medio romántico, simplemente me parece que es perfecta para la ocasión. Y no sólo  la hice pensando en el día de los enamorados, sino en los mesesitos más calurosos que cada día se acercan más.

Esta tarta esta compuesta por una deliciosa costra de mantequilla, rellena con crema pastelera de vainilla ligeramente endulzada y cubierta por jugosas fresas frescas, en mi humilde opinión una verdadera delicia. Es una receta práctica, porque lleva ingredientes accesibles y puedes adelantar la elaboración de algunos componentes, tal vez la crema pastelera es lo que más trabajo necesita, pero yo diria que es la clave para resaltar el color y sabor de las fresas. Esta tarta es perfecta para una pequeña celebración, un brunch, como postre en una parrillada, o sólo como un gusto de fin de semana para las próximas temporadas, especialmente para el verano. Espero que la disfruten mucho, y si tienen alguna tarta/pie de frutas favorito, por favor compartanla!!

Les deseo una semana feliz!!

Raspberry Bloom: Strawberry Tart

Raspberry Bloom: Strawberry Tart

Raspberry Bloom: Strawberry Tart

Raspberry Bloom: Strawberry Tart

Raspberry Bloom: Strawberry Tart

Raspberry Bloom: Strawberry Tart

Raspberry Bloom: Strawberry Tart

Strawberry Tart
(Adapted from Smitten Kitchen)

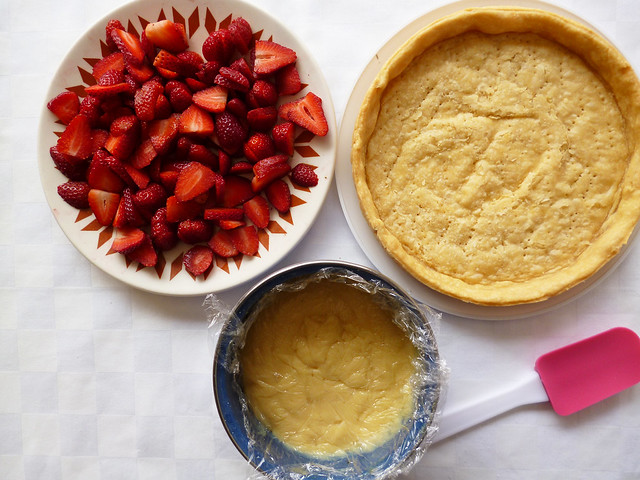
1 fully baked 9-inch tart shell, I used my pie crust recipe
Pastry cream (recipe below)
1 lb fresh strawberries, hulled

Directions
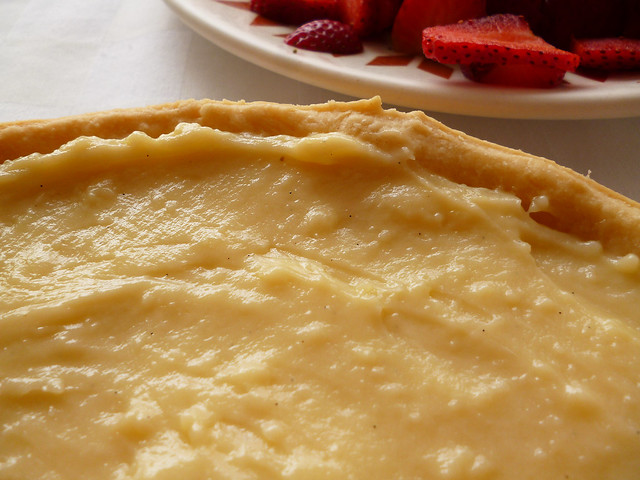
Spread the pastry cream in the bottom of the baked tart shell, and arrange the strawberries over the top to your liking. You can serve it immediately, or you can refrigerate it, and just take it out 10 minutes before serving. Enjoy!!

Pastry Cream

1 1/4 cups whole milk
1/2  vanilla bean, split and scraped (or 1 teaspoon vanilla extract)
3 large egg yolks
1/2 cup sugar
3 Tbs cornstarch
3 Tbs unsalted butter, at room temperature, cut into small pieces

Directions
1. In a small saucepan bring 1 cup milk and the vanilla bean (pulp and pod) to a boil, over medium heat. Cover the pan, and set aside.

2. Working in a heavy-bottomed medium saucepan, whisk the yolks, sugar, 1/4 cup milk, and cornstarch together until thick and pale, about 5 min. Whisking all the while, very slowly drizzle a quarter of the hot milk onto the yolks. Then, still whisking, pour the rest of the liquid in a steady stream over the tempered yolks. Discard the vanilla pod.

3. Put the pan over medium heat, and whisking vigorously and without stop, bring the milk-yolks mixture to the boil. Keep the mixture at the boil, whisking energetically, for 2 to 3 minutes, it will get thicker, then remove the pan from the heat and scrape the pastry cream into a clean bowl.

4. Cut the butter into chunks and stir the chunks into the hot pastry cream, continuing to stir until the butter is melted and incorporated. Now, press a piece of plastic wrap against the surface to prevent a skin from forming. At this point, the cream needs to be thoroughly chilled. You can either set the bowl into a larger bowl filled with ice cubes and cold water for about 20 min, or let it cool at room temperature, and then refrigerate it until ready to be used.

NOTES:
-If you are using vanilla extract, just bring the milk to a boil and proceed with the recipe, adding the extract before you add the butter to the hot pastry cream.
-The cream can be kept tightly covered in the refrigerator for up to 3 days.

Tarta de Fresa
(Adaptado de Smitten Kitchen)

1 base de tarta de 9 pulgadas, yo usé mi costra para pie
Crema pastelera (receta abajo )
450 grms de fresas frescas, cortadas

Instrucciones
Extender la crema pastelera en la base de tarta horneada y arreglar las fresas en la parte superior a tu gusto. Se puede servir de inmediato, o puedes refrigerarla, y sólo sacarla 10 minutos antes de servir. Disfrutala!

Crema Pastelera
1 1/4 tazas de leche entera
1/2 vaina de vainilla, dividida a la mitad y raspado el interior (o 1 cucharadita de extracto de vainilla )
3 yemas de huevo grandes
1/2 taza de azúcar
3 cucharadas de maicena
3 cucharadas Mantequilla sin sal , a temperatura ambiente , cortada en trozos pequeños

Instrucciones
1. En una olla pequeña poner a fuego medio 1 taza de leche y la vaina de vainilla ( pulpa y vaina), y dejar que de un hervor. Tapa la olla y deja a un lado.

2. En una cacerola mediana de fondo grueso, bate las yemas, el azúcar, 1/ 4 taza de leche y la maicena hasta que esté espesa y pálida, unos 5 minutos. Sin dejar de batir, vierte muy lentamente una cuarta parte de la leche caliente a las yemas. De igual forma, sin dejar de batir, vierte el resto de la leche en un flujo constante sobre las yemas temperadas. Desecha la vaina de vainilla .

3. Pon la cacerola a fuego medio, y batiendo vigorosamente y sin parar, llevar la mezcla de leche-yemas a ebullición. Mantener la mezcla en ebullición, batiendo enérgicamente de 2 a 3 minutos, se pondrá espesa. Retira la sartén del fuego y raspar la crema pastelera en un recipiente limpio.

4 . Corta la mantequilla en trozos y mezcla los trozos en la crema pastelera caliente, sin dejar de mover hasta que la mantequilla se derrita y se incorporé. Ahora, presiona un pedazo de plástico contra la superficie para evitar que la formación de nata. En este punto, la crema debe ser enfriada. Puedes colocar el recipiente dentro de otro recipiente de mayor tamaño que este lleno de cubitos de hielo y agua fría durante unos 20 minutos, o deje que se enfríe a temperatura ambiente, y luego refrigera hasta que esté listo para ser utilizado.

NOTAS:
- Si estas utilizando extracto de vainilla, hierve la leche y continua con la receta, añadiendo el extracto antes de añadir la mantequilla a la crema pastelera caliente.
- La crema se puede mantener bien tapada en el refrigerador hasta por 3 días.

Love,
Di

Tuesday, January 14, 2014

Perfect Pie Crust {Handmade}

Raspberry Bloom: Perfect Pie Crust {handmade}

This year I'm planning to make many many pies, and I thought it would be a great idea to share the recipe I always use to make my pie crust. It's a very simple recipe with step by step instructions, the procedure I'm sharing is all by hand, but you can also use a food processor to make the mixing part. In fact, I recently got a food processor and I can't wait to use it for this pie crust, I think it'll save me some time, and it'll be easier to make a batch at any time.

I could say that this recipe is the result of some adjustments I've made to the first recipe I used to make pie crust( some time ago ), just simple variations to the ingredients and procedure, and I'm very pleased with the result, I can certainly say that I've reached my ideal version. This dough so easy to make, smells amazing, it literally  tastes like slightly sweetened butter, and its texture is like a soft cookie that melts in your mouth,
besides I love the fact that it can be refrigerated or frozen, and it'll be as tasty as freshly made, is just perfect. I hope you can try it, and enjoy it as much as we do. If you have any questions or comments I am here to listen (read)!

Este año tengo planeado hacer muchos muchos pies y creí que sería una muy buena idea compartir la receta que siempre uso para mi costra de pie. Es una receta muy simple con instrucciones paso a paso, el procedimiento que estoy compartiendo es todo a mano, pero también se puede utilizar un procesador de alimentos para hacer la parte de la mezcla. De hecho, hace poco Enrique me trajo un procesador de alimentos y no puedo esperar para utilizarlo para hacer esta costra para pie, creo que me va a ahorrar un poco de tiempo y será más fácil hacerla en cualquier momento.

Se podría decir que esta receta es el resultado de algunas adaptaciones en ingredientes y procedimiento que le he hecho a la primera receta con la que hice costra para pie(hace ya algún tiempo), y estoy muy complacida con el resultado, ciertamente puedo decir que he llegado a mí versión ideal. Esta masa es súper sencilla, huele increíble, sabe a deliciosa mantequillita ligeramente endulzada y tiene una textura como de galletita suave que se derrite en tu boca, además me encanta el hecho de que puedes refrigerarla o congelarla y conserva todo su esplendor, es simplemente perfecta. Espero que la prueben y que la disfruten tanto como nosotros. Si tienen alguna duda o comentario aquí estoy para escucharlo(leerlo)!!

Raspberry Bloom: Perfect Pie Crust {handmade}

Raspberry Bloom: Perfect Pie Crust {handmade}

Raspberry Bloom: Perfect Pie Crust {handmade}

Raspberry Bloom: Perfect Pie Crust {handmade}

Raspberry Bloom: Perfect Pie Crust {handmade}

Raspberry Bloom: Perfect Pie Crust {handmade}

Raspberry Bloom: Perfect Pie Crust {handmade}

Raspberry Bloom: Perfect Pie Crust {handmade}

Raspberry Bloom: Perfect Pie Crust {handmade}

Raspberry Bloom: Perfect Pie Crust {handmade}

Perfect Pie Crust {handmade}
makes two 9-inch rounds (Adapted from chez pim)

Ingredients
2 1/4 cup all-purpose flour, plus extra for rolling
2 sticks or 8 ounces unsalted butter, very-cold, cut into 1/2 inch cubes
1/2 tsp salt
1 tsp sugar
1/4 cup cold water

Directions
1. Pour the flour, salt and sugar onto your pastry board or clean countertop.

2. Lay all the butter pieces on top of your pile of flour, and flip each butter chunk to coat it all with flour. Press the butter into the flour with the heal of your hand, you'll have to scrape up some of the flour and butter and flip it over the pile ( if you don't have a scraper you can use a knife). Keep pressing and scraping until the butter becomes thin flakes pressed into the flour. You should end up with a combination of medium flakes and some crumbs. Pile the crumbs.

3. Make a well in the middle of the pile, pour 1/4 cup of iced water into it. Now, work very quickly, use your finger tips to gently blend and distribute the mixture evenly into the water, we're going to gently dump the flour on the sides to the center(where the water is), mix well, you'll have to incorporate  all the butter/flour flakes with the water until you get a somewhat cohesive and smooth dough, it should gather it into a ball. Wrap tightly with plastic and let rest in the fridge for about 45 minutes.

4. After 45 minutes, remove the dough from the fridge and unwrap it. Flour your surface a little, this will avoid stickiness, and place the dough on your work surface or countertop, flour the top of the dough, too. With a rolling pin, roll the dough out to an elongated rectangle, brush off the excess flour from the top of the dough. You will see that the dough will become smoother and more pliable.

Raspberry Bloom: Perfect Pie Crust {handmade}

5. Folding, pick up one end of the rectangle, and fold it 2/3 of the way in, pick up the other end and fold it over that section, do it again, you'll end up with a smaller rectangle, now cut in half. Roll each piece into a ball, and flatten into a disc.

At this point your dough is ready to be used, you can roll it right away into your desired shape, or you can wrap it again in plastic and store it in the fridge, for later use.

6. For rolling into desired shape, sprinkle more flour if needed, just enough to avoid a sticky dough, and roll out to 1/4 inch thickness, and 2-3″ larger than your 9″ pie plate.

Important notes:
-If you feel your dough is a little to soft after divide it(after step #5), wrap your flatten dough discs in plastic and refrigerate at least 30 min before using them for baking.

-If the dough is in the fridge for more than 45 minutes it'll be a little firmer than necessary, so you'll have to let it warm up a bit before rolling.

-Tightly wrapped, the dough will keep in the fridge for a few days, and frozen for-practically-ever.

-To defrost your dough, put it in the fridge section the night before you plan to use it, and before rolling it into your desired shape let it warm at room temperature, this will take about 20 minutes, or until you feel it's okay to work with.

Costra para Pie Perfecta {hecha a mano}
Hace dos circulos de 9 pulgadas ( Adaptado de chez pim)

Ingredientes
2 1/4 taza de harina, y un poco más para espolvorear
2 barras o 226 grms de mantequilla sin sal, muy fría y cortada en cubos de una pulgada aprox.
1/2 cucharadita de sal
1 cucharadita de azúcar
1/4 taza de agua bien fría

Instrucciones
1. Vierta la harina, sal y azúcar en su tabla de amasar o superficie limpia.

2. Coloca todas las piezas de mantequilla en la parte superior de la pila de harina, y volteaa cada trozos de mantequilla de forma que lo cubras todo con harina. Comienza a aplastar la mantequilla sobre la harina con la palma de tu mano, tendrás que raspar un poco la harina y la mantequilla y darle la vuelta a la pila (si usted no tiene un raspador se puede utilizar un cuchillo). Segue aplastando y raspando hasta que la mantequilla se convierta en escamas finas prensadas en la harina. Debes terminar con una combinación de escamas medianas y algunas migajas. Apila todo.

3. Haz un hueco en el centro de la pila, vierte 1/4 taza de agua helada en el hueco. Ahora, se debe trabajar muy rápidamente, usa tus dedos para mezclar suavemente y distribuir la mezcla uniformemente en el agua, vamos a volcar con cuidado la harina de los lados hacia el centro de la pila (donde esta el agua), y mezcla bien, debes incorporar todos los copos de mantequilla-harina con el agua hasta obtener una masa cohesiva de apariencia suave, debe formar una bola y envolverla herméticamente con plástico, para poder dejarla reposar en el refrigerador durante unos 45 minutos.

4. Después de 45 minutos, retira la masa del refrigerador y desenvuelva. Enharina un poco la superficie, esto evitara que se pegue, y coloca la masa en la tabla de amasar o superficie, también espolvorea un poco de harina en la parte superior. Con un rodillo extiende la masa en un rectángulo alargado, y sacude el exceso de harina de la parte superior de la masa. Verás que la pasta se verá muy suave y se sentirá más flexible.

5. Para doblarla, levanta un extremo del rectángulo y doblalo 2/3 hacía adentro, toma el otro extremo y doblalo sobre esa sección, hazlo una vez más, corta el rectángulo resultante a la mitad. Ahora dale forma circular a cada pieza y aplanala en un disco.

En este punto su masa está lista para ser utilizada, se puede dar la forma deseada de inmediato, o se puede envolver nuevamente en plástico y guardarla en el refrigerador, para usar después.

6. para darle la forma deseada, espolvoree más harina, lo suficiente para evitar una masa pegajosa (si es necesario), y dale forma con el rodillo, más o menos de un espesor de 1/4 pulgada y 2-3 pulgadas más grande que un molde para pie de 9 ".

Notas importantes:
- Si crees que tu masa esta un poco suave después de dividirla(paso #5), envuelve los discos de masa aplanada en plástico y refrigera por lo menos 30 minutos antes de usarlos para hornear.

- Si tu masa ha estado en el refrigerador por más de 45 min. se pondrá un poco más firme de lo necesario, así que deja que se "caliente" un poco antes de usar.

- Bien envuelta, la masa se ​​mantendrá en el refrigerador durante un par de días, y se congelada casi por siempre.

- Para descongelar la masa, colocala en la sección del refrigerador una noche antes de que planees usarla, y antes de darle forma dejala a temperatura ambiente por unos 20 minutos, , o hasta que sientas que ya la puedes trabajar.

Love,
Di

Saturday, January 11, 2014

Puerto Escondido

Raspberry Bloom: Puerto Escondido

Hello everyone, I hope you've had an excellent holiday time. I'm so ready to make this year the best ever, I know 2014 started several days ago, but the truth is I'm just starting to get back into my daily routine. I took a very, very long vacation because I really wanted to enjoy all the festivities to the fullest and spend as much time as possible with all my loved ones. I must say it was the best decisions I could had made, because this was the best holiday season that I've ever had, Enrique was on vacation, we tried several new recipes, saw many movies and series, cuddled as much as it was possible, and we spent our last vacation days at the beach, everything was amazing.

For the first post of the year I thought I'd be a great idea to share some of the photos we took on our little trip to the beach. We went to the most amazing place in the world, Puerto Escondido, Oaxaca, we stayed in a small hotel near the sea in Bahía Principal, the place is just amazing its name says everything is like a little hidden gem, we had a great time, we spend a lot of time at the beach enjoying the sun rays(well, Enrique not so much) and the amazing view, along with coconut horchata and ice cream. We also visited Zicatela and La Barra, where Enrique took a surf lesson, the waves were amazing and the instructor was very good and kind, I'd say this is an activity that you can't miss if you visit this awesome place, I didn't surf because I was scared, but it's  definitely something that's in my to-do list and I really hope we can go back someday, so if you go there don't be a chicken like me and just try it, please.

The whole experience was wonderful and I have no words to describe how lucky and grateful I feel, the year couldn't start in a better way, the simple fact of have gone to the beach is already a big achievement for me as this is the first time I go, yes I know it seems unbelievable, but it's true, going to the beach had been one of my biggest dreams for so long, and I'm really happy that finally my prince charming made it come true. Well, these are the pictures we took, I would have liked to take some more but I was really excited and I just wanted to live the moment, I also recorded some short videos with the hope to make a little vlog, so if everything goes well I hope to share it very soon with you. Have a great weekend, and let's keep dreaming and working to make 2014 the best year ever!

Hola a todos, espero que hayan tenido unas excelentes vacaciones, yo ya estoy súper lista para hacer de este año el mejor de todos, se que ya van varios días del 2014, pero la verdad es que  apenas estoy agarrando el paso, ya que me tomé una largas, pero muy largas vacaciones para poder disfrutar de todas las festividades al máximo y pasar el mayor tiempo posible con mis seres queridos. Fue la mejor temporada de fiestas decembrinas que haya tenído, Enrique estuvo de vacaciones, probamos varias recetas nuevas, vimos muchas películas y series, nos acurrucamos todo lo que pudimos y los últimos días de vacaciones fuimos a la Playa, todo fue simplemente perfecto. 

Para el primer post del año creí que no había nada mejor que compartir algunas de las fotos que tomamos en nuestra visita a la playa. Fuimos al lugar más increíble del mundo, Puerto Escondido, Oaxaca, nos quedamos en un hotelito cerca de la orilla del mar en Bahía Principal, el lugar es simplemente íncreible su nombre lo dice todo es como un pequeño tesoro escondido, la pasamos de maravilla, tomamos el sol(bueno Enrique no tanto), horchata de coco, comimos helado y disfrutamos al máximo de la hermosa vista. También visitamos Zicatela y la Barra, que fue donde Enrique tomó una clase de Surf, las olas estaban increíbles y el instructor fue muy bueno, totalmente recomendable, yo me quedé con las ganas de intentarlo porque me dío un poco de miedo, pero es algo que definitivamente esta en mí to-do list y espero que algún día podamos regresar, así que si van a puerto escondido no sean gallinas como yo e intenten hacer surf, por favor.. 

Toda la experiencia fue maravillosa y no tengo palabras para describir lo afortunada y agradecida que me siento, el año no pudo iniciar de mejor forma, el simple hecho de haber ido a la playa ya es un gran logro para mí, ya que es la primera vez que voy, sí lo se parece increíble pero es cierto, llevaba tanto tiempo deseando conocer la playa y estoy muy feliz porque por fin mí príncipe encantador lo hizo realidad. Bueno, los dejó con las pocas fotos que tomamos, me hubiera gustado tomar algunas más pero estaba muy emocionada y sólo quería vivir el momento, también tomé algunos videos con la esperanza de hacer un pequeño vlog asi que espero pronto poder compartirlo con ustedes. Bonito fin de semana y pues a seguir soñando y trabajando para hacer del 2014 el mejor año de todos!!

Raspberry Bloom: Puerto Escondido

Raspberry Bloom: Puerto Escondido

Raspberry Bloom: Puerto Escondido

Raspberry Bloom: Puerto Escondido

Raspberry Bloom: Puerto Escondido

Raspberry Bloom: Puerto Escondido

Raspberry Bloom: Puerto Escondido

Raspberry Bloom: Puerto Escondido

Raspberry Bloom: Puerto Escondido

Raspberry Bloom: Puerto Escondido 

Thanks for everything adventure mate, I love you very much!/ Gracias por todo compañero de aventura, te amo muchísimo!!

Love,
Di
Related Posts Plugin for WordPress, Blogger...