Friday, January 31, 2014

Soft Lemon Ricotta Cookies

Raspberry Bloom: Soft Lemon Ricotta Cookie

Citrus season is in full swing, and I must say I'm very happy about it, because I finally decided to buy a bag of Meyer lemons. I've been using them in salad dressing, strawberry lemonade ( I know it's winter, but here in Puebla there are days that don't feel like that at all), and a couple sweet yummy things, you know how I like them.

One of those sweet things were these delicious lemon-ricotta cookies, that have a cloud consistency and a delicious lemon flavor. Its texture is very soft almost like cake, they have a slight ricotta flavor, and the Meyer lemon certainly gives them a rich hint of  tartness. My two big advice would be, refrigerate the dough and use an ice cream scoop to make the balls, if you have one (obviously I don't have one), this is just to make more symmetrical and better looking cookies. Another thing I must say, is that due to these cookies are really moist the glaze tends to get like a syrup with each passing day, but don´t worry this doesn't affect the flavor at all, I just thought you should know it.

These cookies really made me think about springtime, in fact it seems that that's the only thing I can think about lately (besides Valentine's day), you know, fresh flowers, pastel shades, fresh food with light flavors. Anyway, I hope you enjoy these cookies as much as we did!

What about you,  Do you have any special spring craving, recipes, DIYs , or any fun activity??

_______________________________

La temporada de citricos esta en pleno apojeo y debo decir que estoy muy feliz por eso, ya que por fin me animé a comprar limones eureka. Los he estado usando en aderezo, limonada de fresa (ya se que es invierno, pero en Pueblita hay dias en los que no parece) y en cositas dulces, ya saben como me gustan. Una de ellas fueron estas deliciosas galletitas con consistencia de nube y delicioso sabor a limón, su textura es muy suave casi como pastel, tienen un ligero sabor a ricotta que se percibe en pequeños trocitos y el limón eureka les da un toque acidito, pero rico. Mis dos consejos serían refrigerar la masa y usar una cuchara para helado para hacer las bolitas, si tienen (obviamente yo no tengo uno), esto sólo para darles mejor formita. De igual forma debo decirles que debido a su consistencia húmeda el glaze tiende a hacerce jarabito con el paso de los días, pero en realidad esto no afecta para nada el sabor.

Hacer estas galletas me hizo querer que ya llegué la primavera, en realidad creo que es casi en lo único que puedo pensar ultimamente, además de San Valentín, ya saben, flores, colores pastel, comida con sabores más frescos y ligeros. En fin, espero las disfruten mucho!! 

Que hay de ustedes, ya tienen cositas que les gustaría hacer para primavera, recetas, DIYs, o alguna actividad???


Raspberry Bloom: Soft Lemon Ricotta Cookies

Raspberry Bloom: Soft Lemon Ricotta Cookie

Raspberry Bloom: Soft Lemon Ricotta Cookie

Raspberry Bloom: Soft Lemon Ricotta Cookie 

Soft Lemon Ricotta Cookies
Adapted from foodnetwork, by Giada De Laurentiis. Makes 22 cookies.

Ingredients
1 1/4 cups all-purpose flour
1/2 teaspoon baking powder
1/4 teaspoon salt
1/2 stick unsalted butter (1/4 cup), softened
3/4 cups sugar
1 lemon, zested (4 oz. aprox.)
1 1/2 tablespoons Meyer lemon juice
1 eggs
7. 5 ounce whole milk ricotta cheese

Glaze:
3/4 cup powdered sugar
1 1/2 tablespoons Meyer lemon juice
1/2 lemon, zested

Directions
1. In a medium bowl combine dry ingredients, flour, baking powder, and salt, mix with a fork. Set aside.

2. Using an electric mixer beat the butter, sugar,  and lemon zest together, until light and fluffy, about 5 minutes. Add the egg, beating until incorporated. Add the ricotta cheese and lemon juice, beat to combine. Stir in the dry ingredients. Mix the dough until slightly moist and well incorporated.

3. Cover dough tightly with plastic wrap, and chill on the fridge for at least 2 hours.

4. Preheat the oven to 375 degrees F.

5. Line 2 baking sheets with parchment paper. Scoop the dough onto the baking sheets. Bake for 15 minutes, or until slightly golden at the edges. Remove from the oven and let the cookies rest on the baking sheet for about 15 minutes.

6. Meanwhile prepare your glaze: Combine the powdered sugar, lemon juice, and lemon zest in a small bowl and stir until smooth.

7. Once your cookies have cooled a bit, spoon about 1/2-teaspoon of the glaze onto each cookie and gently spread it. Let the glaze harden before serving, about 20 min. Store in an airtight container.Now, let's eat!!

Galletas Suaves de Limón y Ricotta 
Adaptado de foodnetwork, por Giada De Laurentiis. Rinde 22 galletas.

Ingredientes
1 1/4 tazas de harina
1/2 cucharadita de polvo para hornear
1/4 cucharadita de sal
1/2 barra de mantequilla sin sal (1/4 de taza), ablandada
3/4 tazas de azúcar
1 huevo
1 limón eureka, ralladura ( 4 oz aprox.)
1 1/2 cucharadas de jugo de limón eureka
210 grms de queso ricotta de leche entera

Glaseado:
3/4 taza de azúcar glass
1 1/2 cucharadas de jugo de limón eureka
1/2 limón eureka, ralladura

Instrucciones
1. En un tazón mediano combina los ingredientes secos, harina, polvo para hornear y sal, mezcla con un tenedor. Pon a un lado.

2. Con una batidora eléctrica batir la mantequilla, el azúcar y la ralladura de limón juntos, hasta ligero y esponjada, aproximadamente 5 minutos. Añadir el huevo , batiendo hasta que se incorpore. Añade el queso ricotta y el jugo de limón, bate para combinar. Agregua los ingredientes secos. Mezcla hasta que la masa esté ligeramente húmeda y bien incorporada.

3. Cubre la masa con papel plástico y refrigerala durante al menos 2 horas.

4. Precaliente el horno a 375 grados F.

5. Forra 2 bandejas para hornear con papel pergamino/encerado o aluminio. Saca la masa del refrigerador y coloca la masa a cucharadas sobre la bandeja del horno. Hornear durante 15 minutos o hasta que esten ligeramente doradas en los bordes. Retira del horno y deja que las galletas reposen en la bandeja durante unos 15 minutos.

6. Mientras tanto preparar el glaseado: Combina el azúcar glass, jugo de limón y la ralladura de limón en un tazón pequeño y revuelve hasta que esté suave .

7. Una vez que tus galletas se han enfriado un poco, vierte aproximadamente 1/2 cucharadita de glaseado sobre cada galleta y untalo suavemente. Deja que el glaeado seque antes de servir, unos 20 min . Almacene en un recipiente hermético. Ahora,  a comer!


Love,
Di


Thursday, January 30, 2014

DIY Heart Pillow

Raspberry Bloom: DIY Heart Pillow

Some years ago I took a short course on how to make "stuffed animals", I learned to do many many things there, including this cute pillow, my pillow back then wasn't that pretty, and I may or may not  had to get rid of it, the thing is that since then I've always wanted to make a better version of it. After a long time and since Valentine's day is just around the corner, I finally decided to stop being lazy and make my pillow. It's a really easy DIY, you just have to cut, sew and stuff,  the best part is you can choose any fabric you like and make it the size you want.  I made mine with a red velvet fabric, it measures abut 16 -inch, and I used a simple straight stitch. I think this is a nice way to add some coziness to your space, and could also be a great Valentine's Day gift.

I'm very excited to share my first DIY with you, the truth is I really enjoy doing this kind of tiny projects, I love to customize, and make my own version of some things to make my surroundings happier and prettier. I Hope you like it, and definitely there will be more of this type of post in the future......

Hace algunos años tomé un cursito de como hacer peluches y ahi aprendi a hacer muchas muchas cosas, entre ellas este cojín, esa vez no me quedo tan lindo, pero me quede con muchas ganas de hacer uno en algún otro momento. Después de mucho tiempo y con motivo de San Valentín, decidí dejar de ser flojilla y hacer mi cojín. Es bastante sencillo, sólo es cortar, coser y rellenar, lo mejor de esto es que puedes elegir cualquier tela de tu agrado y hacerlo del tamaño que quieras.  Yo hice el mío de terciopelo rojo, mide aproximadamente 40 cm y usé máquina de coser con puntada sencilla. Yo creo que es una linda forma de hacer tu espacio más acogedor y además creo que también podría ser un muy buen regalo de San Valentín.

Estoy muy emocionada por compartir mi primer DIY con ustedes, la verdad es que disfruto mucho hacer este tipo de proyectos pequeñitos, me encanta costumizar y hacer mi propia versión de algunas cosas para hacer mi estorno más feliz y bonito. Espero que les guste y definitivamente habrá más de este tipo de post en el futuro......

Raspberry Bloom: DIY Heart Pillow

Supplies
Fabric, depending on the size of your heart/ Tela, dependiendo del tamaño de tu corazón
Pillow stuffing/ Relleno para almohada
Paper heart template, you can trace it by hand or print it/ Molde de corazón de papel, pudes trazarlo a mano o imprimirlo
Marker/ Marcador
Scissors/ Tijeras
Pins/ Alfileres 
Needle and thread to match your fabric/ Aguja e hilo que combine con tu tela
Sewing machine (or fabric glue)/ Maquina de coser (o pegamento para tela)

Raspberry Bloom: DIY Heart Pillow
1. Fold the fabric in half, and pin your heart template onto your fabric. Cut your heart, leaving a 1/2 inch seam allowance./ Dobla la tela por la mitad, y asegura con alfileres la plantilla de corazón en la tela. Corta el corazón, dejando un margen de 1 cm de costura.

Raspberry Bloom: DIY Heart Pillow
2. I like to baste things before sew, so I can have like a guide, but you can totally skip this step if you want. Now, sew with the sewing machine along the shape, leaving an opening in one side of the heart so you can easily stuff  the filling inside./ A mi me gustar hilvanar las cosas antes de coser, para que pueda tener como una guía, pero puedes omitir este paso si lo deseas. Ahora, cose con máquina a lo largo de la forma, dejando una abertura en un lado del corazón para que puedas rellenar fácilmente.

Raspberry Bloom: DIY Heart Pillow
3.Turn the fabric right side out and stuff./ Voltea la tela al derecho y rellena.

Raspberry Bloom: DIY Heart Pillow
4. Once is all filled and spongy, hand sew the side opening, closed with a needle and thread./ Una vez que está todo lleno y esponjoso, cose a mano la abertura lateral, cerrado con aguja e hilo.

Raspberry Bloom: DIY Heart Pillow

And that's it, now you have a pretty heart pillow to decorate your bed, couch, or chair, for Valentine's day or all year round. Just spread the love!!

Y eso es todo, ahora tienes una linda almohada de corazón para decorar tu cama, sofá, o  silla, para el día de San Valentín o durante todo el año.


Love,
Di

Wednesday, January 22, 2014

Instagram Diaries

Raspberry Bloom: Instagram Diaries
{Puerto Escondido stole my heart./ Puerto Escondido robó mi corazón}

The first instagram diaries of the year, I'm really excited to document what 2014 has prepared for us!! :)

El primer "instagram diaries" del año, estoy muy emocionada de documentar lo que el 2014 tiene preparado para nosotros! :)

Raspberry Bloom: Instagram Diaries
{I'm already getting ready for spring, this is the first time I use Meyer lemons and ricotta cheese./Ya me estoy preparando para la primavera, esta es la primera vez que uso limón eureka (los encontré en Costco) y queso ricotta}

Raspberry Bloom: Instagram Diaries
{The cutest donut ever./ La dona más bonita del mundo}

Raspberry Bloom: Instagram Diaries
{Thinking of Valentine's day, and summer, recipe here./ Pensando en el día de San Valentín y el verano, receta aquí.

Raspberry Bloom: Instagram Diaries
{Outfit for Enrique's birthday, I can wear a peplum top anytime of the year. /Outfit para el cumpleaños de Enrique, puedo llevar un top peplum en cualquier momento del año.

Raspberry Bloom: Instagram Diaries
{Berries + yogurt + maple syrup the best way to start my day./ Bayas + yogur + maple syrup la mejor manera de empezar mi día}


Instagram: @dianaabaroa 

Love,
Di

Tuesday, January 21, 2014

Strawberry Tart

Raspberry Bloom: Strawberry Tart

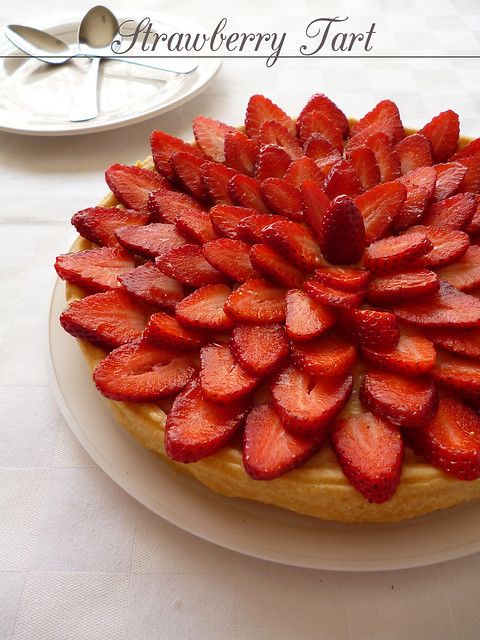
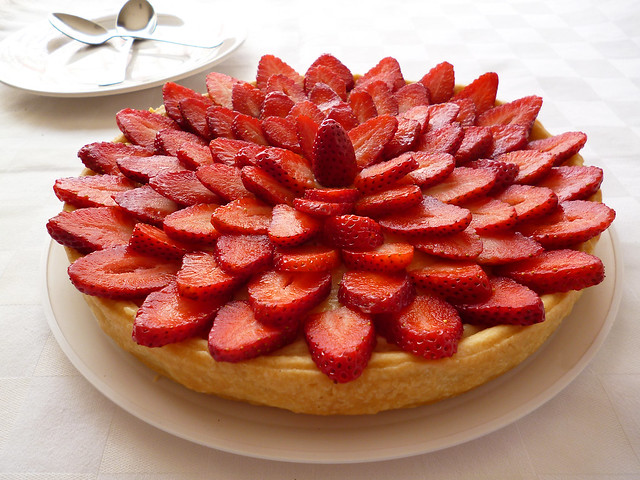
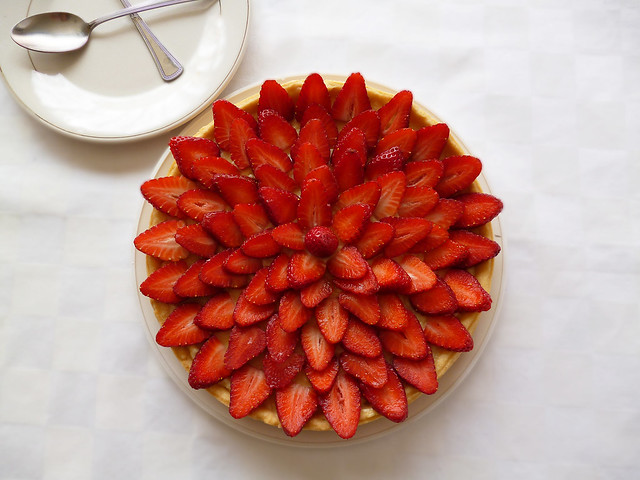
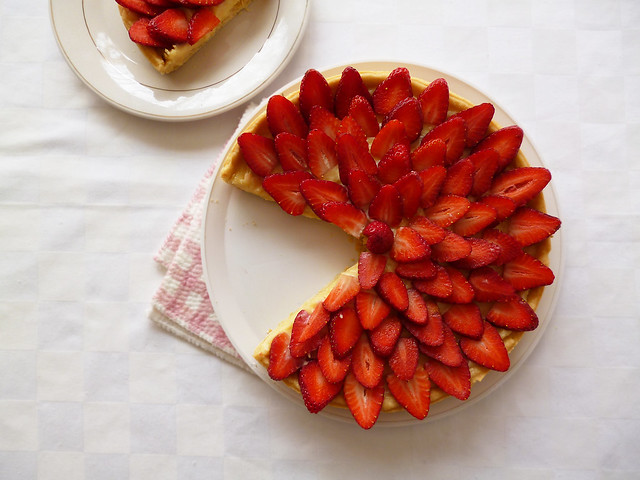
This is the first tart/pie of many more that you'll see throughout the year, and is also the first of three recipe I plan to share for Valentine's Day. I chose this tart because it's very easy to make, and it has a subtle romantic vibe, which in my opinion make it perfect for the occasion. I made this tart having V-day in mind, but I also think it's a warmer weather staple dish.

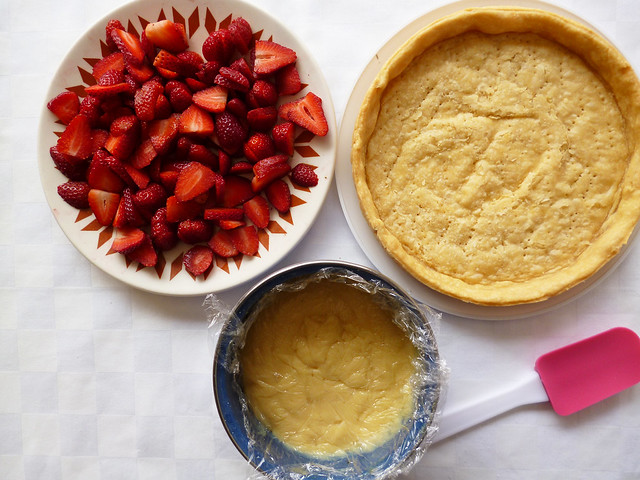
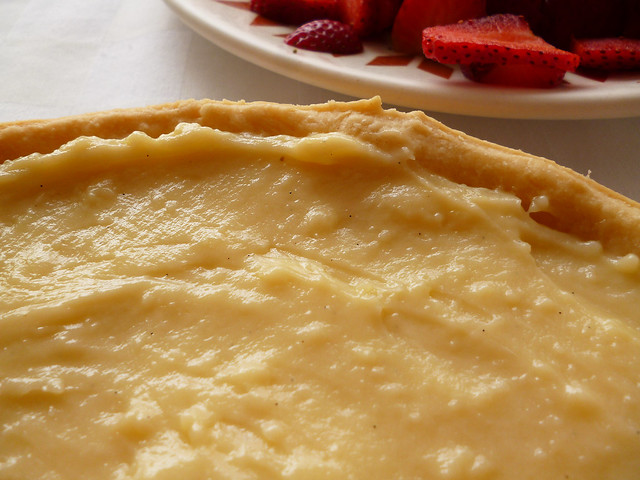
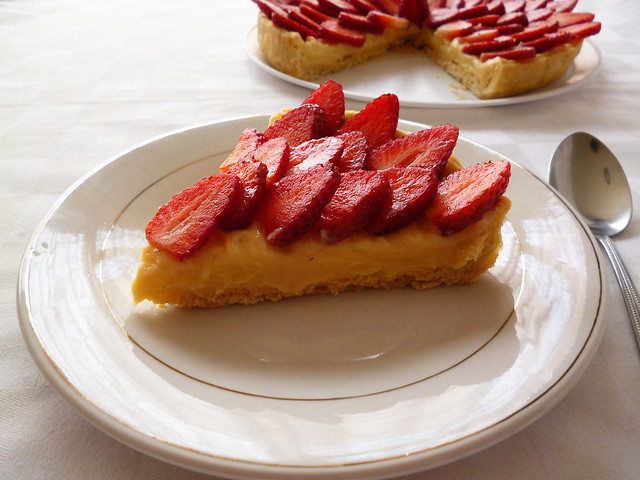
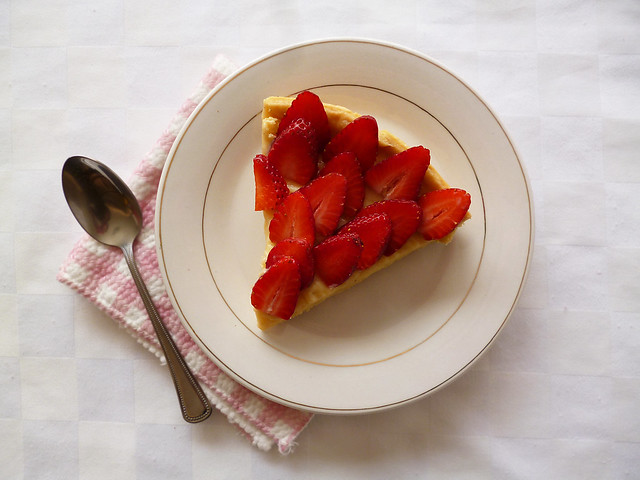
This tart has a delicious buttery crust, it´s filled with slightly sweetened pastry cream,  and topped with juicy fresh strawberries, in my humble opinion just the best thing ever. Besides, it has accessible ingredients, and you can make ahead most of it. This tart is perfect for a small celebration, a brunch, as dessert for a BBQ party, or just as a weekend treat, especially for the summertime. I hope you enjoy it, and if you have any favorite fruit tart/pie recipe please share!!

Have a great week!!

Esta es la primer tarta/pie de muchas más que veran a lo largo del año, también es la primera de tres receta que planeo compartir con motivo de San Valentín. Elegí esta tarta porque es muy sencilla y tiene ese toque medio romántico, simplemente me parece que es perfecta para la ocasión. Y no sólo  la hice pensando en el día de los enamorados, sino en los mesesitos más calurosos que cada día se acercan más.

Esta tarta esta compuesta por una deliciosa costra de mantequilla, rellena con crema pastelera de vainilla ligeramente endulzada y cubierta por jugosas fresas frescas, en mi humilde opinión una verdadera delicia. Es una receta práctica, porque lleva ingredientes accesibles y puedes adelantar la elaboración de algunos componentes, tal vez la crema pastelera es lo que más trabajo necesita, pero yo diria que es la clave para resaltar el color y sabor de las fresas. Esta tarta es perfecta para una pequeña celebración, un brunch, como postre en una parrillada, o sólo como un gusto de fin de semana para las próximas temporadas, especialmente para el verano. Espero que la disfruten mucho, y si tienen alguna tarta/pie de frutas favorito, por favor compartanla!!

Les deseo una semana feliz!!

Raspberry Bloom: Strawberry Tart

Raspberry Bloom: Strawberry Tart

Raspberry Bloom: Strawberry Tart

Raspberry Bloom: Strawberry Tart

Raspberry Bloom: Strawberry Tart

Raspberry Bloom: Strawberry Tart

Raspberry Bloom: Strawberry Tart

Strawberry Tart
(Adapted from Smitten Kitchen)

1 fully baked 9-inch tart shell, I used my pie crust recipe
Pastry cream (recipe below)
1 lb fresh strawberries, hulled

Directions
Spread the pastry cream in the bottom of the baked tart shell, and arrange the strawberries over the top to your liking. You can serve it immediately, or you can refrigerate it, and just take it out 10 minutes before serving. Enjoy!!

Pastry Cream

1 1/4 cups whole milk
1/2  vanilla bean, split and scraped (or 1 teaspoon vanilla extract)
3 large egg yolks
1/2 cup sugar
3 Tbs cornstarch
3 Tbs unsalted butter, at room temperature, cut into small pieces

Directions
1. In a small saucepan bring 1 cup milk and the vanilla bean (pulp and pod) to a boil, over medium heat. Cover the pan, and set aside.

2. Working in a heavy-bottomed medium saucepan, whisk the yolks, sugar, 1/4 cup milk, and cornstarch together until thick and pale, about 5 min. Whisking all the while, very slowly drizzle a quarter of the hot milk onto the yolks. Then, still whisking, pour the rest of the liquid in a steady stream over the tempered yolks. Discard the vanilla pod.

3. Put the pan over medium heat, and whisking vigorously and without stop, bring the milk-yolks mixture to the boil. Keep the mixture at the boil, whisking energetically, for 2 to 3 minutes, it will get thicker, then remove the pan from the heat and scrape the pastry cream into a clean bowl.

4. Cut the butter into chunks and stir the chunks into the hot pastry cream, continuing to stir until the butter is melted and incorporated. Now, press a piece of plastic wrap against the surface to prevent a skin from forming. At this point, the cream needs to be thoroughly chilled. You can either set the bowl into a larger bowl filled with ice cubes and cold water for about 20 min, or let it cool at room temperature, and then refrigerate it until ready to be used.

NOTES:
-If you are using vanilla extract, just bring the milk to a boil and proceed with the recipe, adding the extract before you add the butter to the hot pastry cream.
-The cream can be kept tightly covered in the refrigerator for up to 3 days.

Tarta de Fresa
(Adaptado de Smitten Kitchen)

1 base de tarta de 9 pulgadas, yo usé mi costra para pie
Crema pastelera (receta abajo )
450 grms de fresas frescas, cortadas

Instrucciones
Extender la crema pastelera en la base de tarta horneada y arreglar las fresas en la parte superior a tu gusto. Se puede servir de inmediato, o puedes refrigerarla, y sólo sacarla 10 minutos antes de servir. Disfrutala!

Crema Pastelera
1 1/4 tazas de leche entera
1/2 vaina de vainilla, dividida a la mitad y raspado el interior (o 1 cucharadita de extracto de vainilla )
3 yemas de huevo grandes
1/2 taza de azúcar
3 cucharadas de maicena
3 cucharadas Mantequilla sin sal , a temperatura ambiente , cortada en trozos pequeños

Instrucciones
1. En una olla pequeña poner a fuego medio 1 taza de leche y la vaina de vainilla ( pulpa y vaina), y dejar que de un hervor. Tapa la olla y deja a un lado.

2. En una cacerola mediana de fondo grueso, bate las yemas, el azúcar, 1/ 4 taza de leche y la maicena hasta que esté espesa y pálida, unos 5 minutos. Sin dejar de batir, vierte muy lentamente una cuarta parte de la leche caliente a las yemas. De igual forma, sin dejar de batir, vierte el resto de la leche en un flujo constante sobre las yemas temperadas. Desecha la vaina de vainilla .

3. Pon la cacerola a fuego medio, y batiendo vigorosamente y sin parar, llevar la mezcla de leche-yemas a ebullición. Mantener la mezcla en ebullición, batiendo enérgicamente de 2 a 3 minutos, se pondrá espesa. Retira la sartén del fuego y raspar la crema pastelera en un recipiente limpio.

4 . Corta la mantequilla en trozos y mezcla los trozos en la crema pastelera caliente, sin dejar de mover hasta que la mantequilla se derrita y se incorporé. Ahora, presiona un pedazo de plástico contra la superficie para evitar que la formación de nata. En este punto, la crema debe ser enfriada. Puedes colocar el recipiente dentro de otro recipiente de mayor tamaño que este lleno de cubitos de hielo y agua fría durante unos 20 minutos, o deje que se enfríe a temperatura ambiente, y luego refrigera hasta que esté listo para ser utilizado.

NOTAS:
- Si estas utilizando extracto de vainilla, hierve la leche y continua con la receta, añadiendo el extracto antes de añadir la mantequilla a la crema pastelera caliente.
- La crema se puede mantener bien tapada en el refrigerador hasta por 3 días.

Love,
Di
Related Posts Plugin for WordPress, Blogger...