
This year I'm planning to make many many pies, and I thought it would be a great idea to share the recipe I always use to make my pie crust. It's a very simple recipe with step by step instructions, the procedure I'm sharing is all by hand, but you can also use a food processor to make the mixing part. In fact, I recently got a food processor and I can't wait to use it for this pie crust, I think it'll save me some time, and it'll be easier to make a batch at any time.
I could say that this recipe is the result of some adjustments I've made to the first recipe I used to make pie crust( some time ago ), just simple variations to the ingredients and procedure, and I'm very pleased with the result, I can certainly say that I've reached my ideal version. This dough so easy to make, smells amazing, it literally tastes like slightly sweetened butter, and its texture is like a soft cookie that melts in your mouth,
besides I love the fact that it can be refrigerated or frozen, and it'll be as tasty as freshly made, is just perfect. I hope you can try it, and enjoy it as much as we do. If you have any questions or comments I am here to listen (read)!
Este año tengo planeado hacer muchos muchos pies y creí que sería una muy buena idea compartir la receta que siempre uso para mi costra de pie. Es una receta muy simple con instrucciones paso a paso, el procedimiento que estoy compartiendo es todo a mano, pero también se puede utilizar un procesador de alimentos para hacer la parte de la mezcla. De hecho, hace poco Enrique me trajo un procesador de alimentos y no puedo esperar para utilizarlo para hacer esta costra para pie, creo que me va a ahorrar un poco de tiempo y será más fácil hacerla en cualquier momento.
Se podría decir que esta receta es el resultado de algunas adaptaciones en ingredientes y procedimiento que le he hecho a la primera receta con la que hice costra para pie(hace ya algún tiempo), y estoy muy complacida con el resultado, ciertamente puedo decir que he llegado a mí versión ideal. Esta masa es súper sencilla, huele increíble, sabe a deliciosa mantequillita ligeramente endulzada y tiene una textura como de galletita suave que se derrite en tu boca, además me encanta el hecho de que puedes refrigerarla o congelarla y conserva todo su esplendor, es simplemente perfecta. Espero que la prueben y que la disfruten tanto como nosotros. Si tienen alguna duda o comentario aquí estoy para escucharlo(leerlo)!!


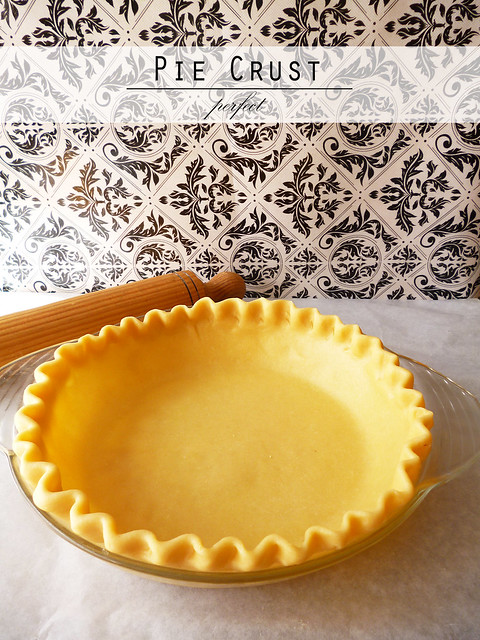
Perfect Pie Crust {handmade}
makes two 9-inch rounds (Adapted from chez pim)
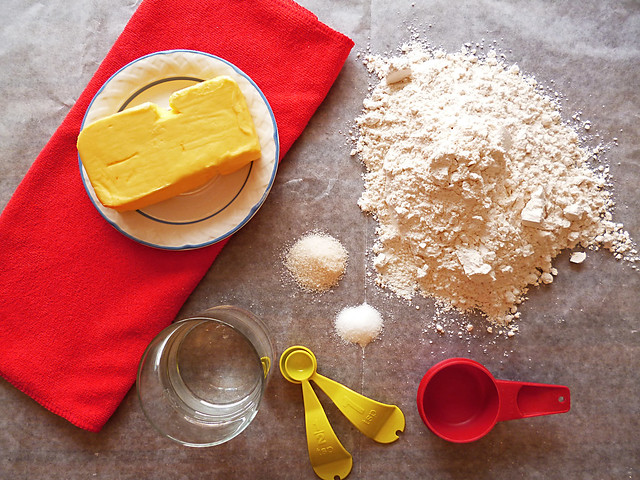
Ingredients
2 1/4 cup all-purpose flour, plus extra for rolling
2 sticks or 8 ounces unsalted butter, very-cold, cut into 1/2 inch cubes
1/2 tsp salt
1 tsp sugar
1/4 cup cold water
Directions
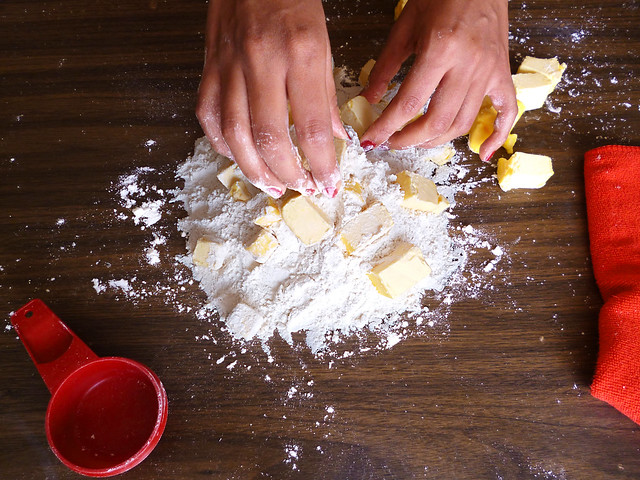
1. Pour the flour, salt and sugar onto your pastry board or clean countertop.
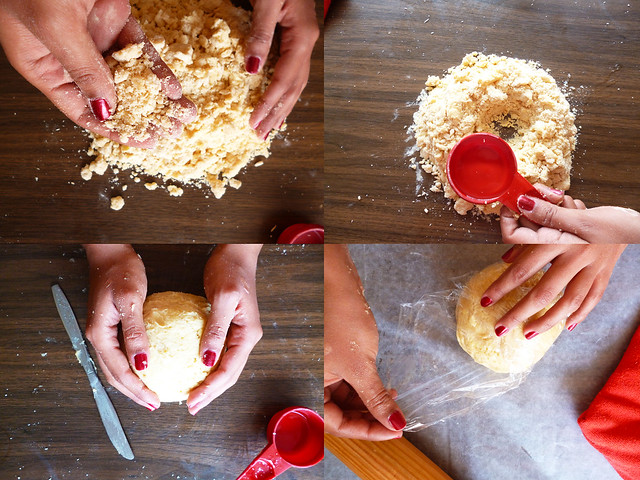
2. Lay all the butter pieces on top of your pile of flour, and flip each butter chunk to coat it all with flour. Press the butter into the flour with the heal of your hand, you'll have to scrape up some of the flour and butter and flip it over the pile ( if you don't have a scraper you can use a knife). Keep pressing and scraping until the butter becomes thin flakes pressed into the flour. You should end up with a combination of medium flakes and some crumbs. Pile the crumbs.
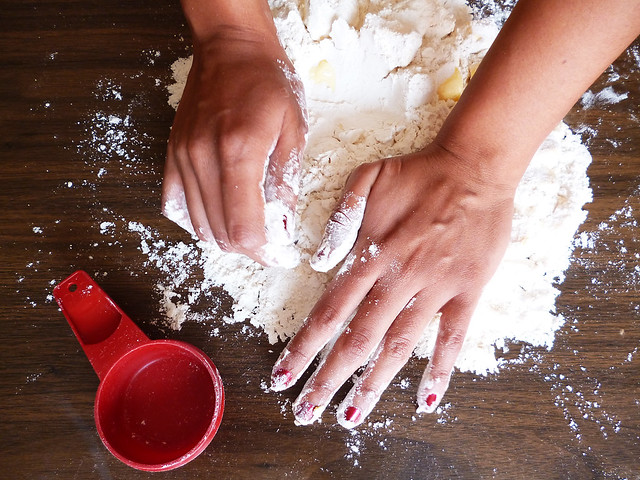
3. Make a well in the middle of the pile, pour 1/4 cup of iced water into it. Now, work very quickly, use your finger tips to gently blend and distribute the mixture evenly into the water, we're going to gently dump the flour on the sides to the center(where the water is), mix well, you'll have to incorporate all the butter/flour flakes with the water until you get a somewhat cohesive and smooth dough, it should gather it into a ball. Wrap tightly with plastic and let rest in the fridge for about 45 minutes.
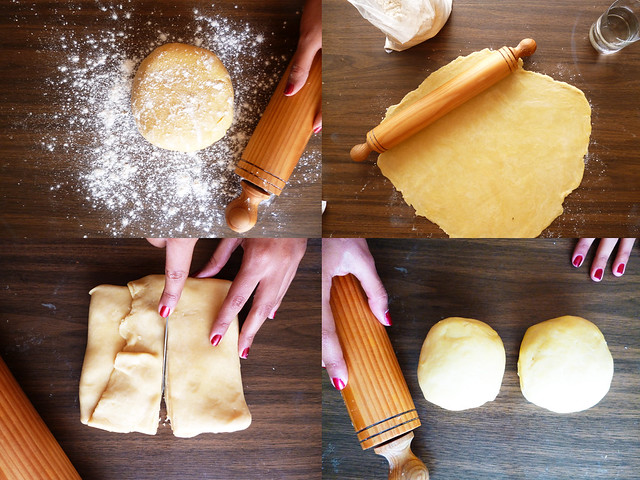
4. After 45 minutes, remove the dough from the fridge and unwrap it. Flour your surface a little, this will avoid stickiness, and place the dough on your work surface or countertop, flour the top of the dough, too. With a rolling pin, roll the dough out to an elongated rectangle, brush off the excess flour from the top of the dough. You will see that the dough will become smoother and more pliable.

5. Folding, pick up one end of the rectangle, and fold it 2/3 of the way in, pick up the other end and fold it over that section, do it again, you'll end up with a smaller rectangle, now cut in half. Roll each piece into a ball, and flatten into a disc.
At this point your dough is ready to be used, you can roll it right away into your desired shape, or you can wrap it again in plastic and store it in the fridge, for later use.
Important notes:
-If you feel your dough is a little to soft after divide it(after step #5), wrap your flatten dough discs in plastic and refrigerate at least 30 min before using them for baking.
-If the dough is in the fridge for more than 45 minutes it'll be a little firmer than necessary, so you'll have to let it warm up a bit before rolling.
-To defrost your dough, put it in the fridge section the night before you plan to use it, and before rolling it into your desired shape let it warm at room temperature, this will take about 20 minutes, or until you feel it's okay to work with.
Hace dos circulos de 9 pulgadas ( Adaptado de chez pim)
Ingredientes
2 1/4 taza de harina, y un poco más para espolvorear
2 barras o 226 grms de mantequilla sin sal, muy fría y cortada en cubos de una pulgada aprox.
1/2 cucharadita de sal
1 cucharadita de azúcar
1/4 taza de agua bien fría
Instrucciones
1. Vierta la harina, sal y azúcar en su tabla de amasar o superficie limpia.
2. Coloca todas las piezas de mantequilla en la parte superior de la pila de harina, y volteaa cada trozos de mantequilla de forma que lo cubras todo con harina. Comienza a aplastar la mantequilla sobre la harina con la palma de tu mano, tendrás que raspar un poco la harina y la mantequilla y darle la vuelta a la pila (si usted no tiene un raspador se puede utilizar un cuchillo). Segue aplastando y raspando hasta que la mantequilla se convierta en escamas finas prensadas en la harina. Debes terminar con una combinación de escamas medianas y algunas migajas. Apila todo.
3. Haz un hueco en el centro de la pila, vierte 1/4 taza de agua helada en el hueco. Ahora, se debe trabajar muy rápidamente, usa tus dedos para mezclar suavemente y distribuir la mezcla uniformemente en el agua, vamos a volcar con cuidado la harina de los lados hacia el centro de la pila (donde esta el agua), y mezcla bien, debes incorporar todos los copos de mantequilla-harina con el agua hasta obtener una masa cohesiva de apariencia suave, debe formar una bola y envolverla herméticamente con plástico, para poder dejarla reposar en el refrigerador durante unos 45 minutos.
4. Después de 45 minutos, retira la masa del refrigerador y desenvuelva. Enharina un poco la superficie, esto evitara que se pegue, y coloca la masa en la tabla de amasar o superficie, también espolvorea un poco de harina en la parte superior. Con un rodillo extiende la masa en un rectángulo alargado, y sacude el exceso de harina de la parte superior de la masa. Verás que la pasta se verá muy suave y se sentirá más flexible.
5. Para doblarla, levanta un extremo del rectángulo y doblalo 2/3 hacía adentro, toma el otro extremo y doblalo sobre esa sección, hazlo una vez más, corta el rectángulo resultante a la mitad. Ahora dale forma circular a cada pieza y aplanala en un disco.
En este punto su masa está lista para ser utilizada, se puede dar la forma deseada de inmediato, o se puede envolver nuevamente en plástico y guardarla en el refrigerador, para usar después.
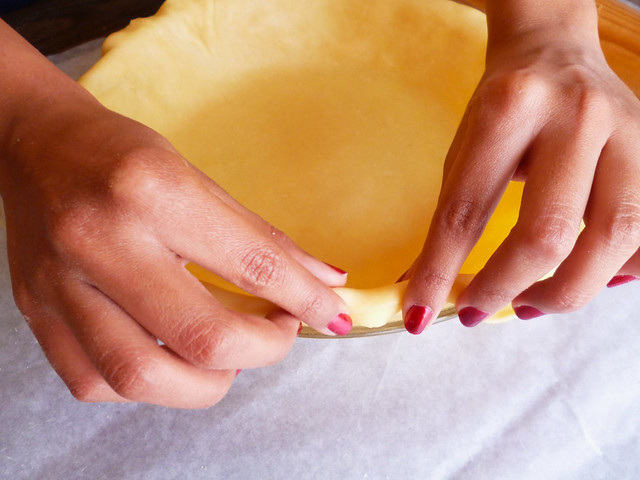
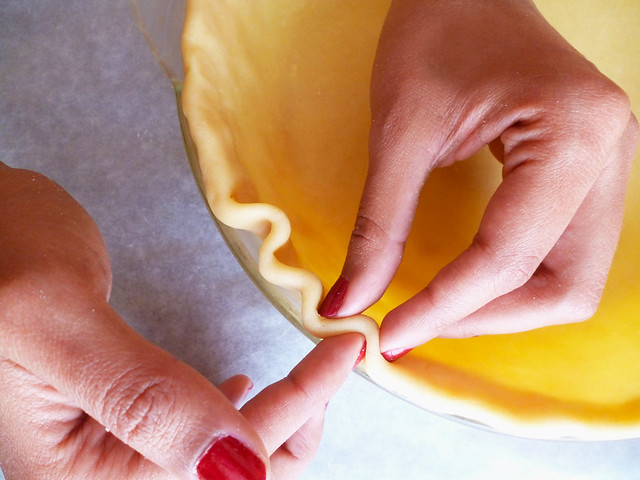
6. para darle la forma deseada, espolvoree más harina, lo suficiente para evitar una masa pegajosa (si es necesario), y dale forma con el rodillo, más o menos de un espesor de 1/4 pulgada y 2-3 pulgadas más grande que un molde para pie de 9 ".
Notas importantes:
- Si crees que tu masa esta un poco suave después de dividirla(paso #5), envuelve los discos de masa aplanada en plástico y refrigera por lo menos 30 minutos antes de usarlos para hornear.
- Si tu masa ha estado en el refrigerador por más de 45 min. se pondrá un poco más firme de lo necesario, así que deja que se "caliente" un poco antes de usar.
- Bien envuelta, la masa se mantendrá en el refrigerador durante un par de días, y se congelada casi por siempre.
- Para descongelar la masa, colocala en la sección del refrigerador una noche antes de que planees usarla, y antes de darle forma dejala a temperatura ambiente por unos 20 minutos, , o hasta que sientas que ya la puedes trabajar.
Love,
Di
Hola bonita!
ReplyDeleteFantástico!!
Siempre busco una buena costra para pie y ésta me parece estupenda, tengo que probarla el paso a paso es impresionante, me encantó! Ahora mismo me la guardo!
Por cierto vi la entrada de tus vacaciones, has ido a Puerto Escondido, estábamos tan cerca! Un besito enorme y feliz día!
Hola Esme!! Siiii, espero que la disfrutes mucho, de verdad es deliciosa!!
DeleteEn serio estabamos cerquita, quien diría, yo me enamoré de ese lugar, no me quería regresar, es increíble que vivas cerca!!
Besos, y que tengas un gran día!!! :D
Madre mía! Te ha quedado divina! Cuando necesite una costra para pie ya sabré dónde consultar. Magníficas explicaciones. Bsos
ReplyDeleteyo tmb quiero hacer pies!!! se ve muy fácil la receta, la voy a mandar a pinterest para tenerla disponible :)
ReplyDeleteYeiiiiiii, ya somos dos entonces!! Es bastante fácil de hacer y con la práctica más, si tienes alguna duda o algo así, ya sabes con toda confianza.
DeleteMuchas gracias por la visita Paty, de verdard me sacaste una sonrisa enorme!!
Espero que tengas un día increíble. Besos!! :D
Yo no sé si tendré tanto arte para hacer la masa. Además, no puedo tomar mantequilla, así que a ver cómo me las ingenio. Creo que prefiero que me invites porque te quedó de lujo y se te da de maravilla.
ReplyDeleteBesos y feliz semana.
How long do you bake the pie crust? I am making it with your Strawberry Tart, and don't know how to prepare the crust beforehand.
ReplyDeleteHi,
DeleteWell, what I do is preheat oven to 400 degrees F. Next I prick the pastry base with a fork in several places to allow airflow and prevent bubbles, then I line the base with aluminium foil or wax paper, and fill it with dried beans to the top. I bake it like this for about 15 minutes, then I remove the weights and foil, and I bake it for another 10 min, or so, until light golden brown.
This link has a really helpful step-by-step http://blog.williams-sonoma.com/how-to-blind-bake-a-pie-or-tart/
I hope this can help you, and that you get a beautiful pie crust. If you have any other question, please let me know........Enjoy your tart, and thank you so much for try the recipe!!!
Love,
Diana